Showing posts with label chocolate. Show all posts

Friday, 26 March 2010

Indulgent Chocolate Mousse

Part of the reason I find myself flipping through Leith's quite so often is that it's great for basic recipes. It's Delia for people who know how to boil an egg. After a batch of meringues left me with several egg yolks, I sought out a recipe for a classic chocolate mousse.

Rich chocolate mousse - unfortunately I ate it before I could photograph the bubbles.

The 'classic' recipe used whole eggs, so I opted for the 'rich' version instead. It was pretty simple to make, although as usual, me and boiling sugar do not get on. The recipe calls for the sugar syrup to be boiled to short thread stage. The suggested way of testing this is to dip your fingers in the sugar and see if a short thread is formed. I didn't fancy putting my hand in boiling sugar (I have definitely been there and done that) so I got the ancient sugar thermometer out instead. Annoyingly, while 'crack' and 'softball' were marked, short thread was not.

I figured that if Prue Leith was telling me to stick my hand in boiling sugar, it can't be that hot. I boiled it to around 80C, although finding the sugar syrup table in the book later (why is it not indexed?) I found out that short thread stage is actually 108.3C. So there.

This probably explains why my mousses were a bit denser than I'd expected, as the syrup and egg yolks didn't fluff up as much as the book said they would. They were still pretty damn tasty, and I filled 5 ramekins with a gloriously thick chocolate goo. I used very dark chocolate, and I think in recipes like this, it is a travesty not to. The chocolate gets watered down with cream and sugar during the process of the recipe, so using a milky chocolate to start with will just dilute it even further. You'll basically have a homeopathic chocolate mousse, and that's not going to cure any ills.

With hindsight, I think it might have been nice to swirl a bit of raspberry puree through as well. It is very rich, so a bit of fruitiness would balance that well.

Rich Chocolate Mousse (Adapted from Leith's Cookery Bible)
Makes 4-6 depending on ramekin size

70g granulated sugar
110ml water
3 egg yolks
170g very dark chocolate
300ml double cream

1) Heat the sugar and water in a small saucepan gently. Heat until it reaches the short thread stage (a thread of about 1cm between a wet thumb and finger, or 108C/227F). Leave to cool slightly.
2) Give the egg yolks a quick whisk in a large bowl to combine them. Slowly pour in the cooled syrup, whisking all the time. Continue until the mixture is thick and bubbly.
3) Melt the chocolate in a microwave or bain marie. Fold the melted chocolate in to the eggs.
4) In a separate bowl, whip the cream until it forms soft peaks. Gently fold this in to the mousse mixture.
5) Pour the mixture in to ramekins (maybe layer with some raspeberry puree at this point) and leave to set in the fridge for 4 hours.

Wednesday, 24 March 2010

Black and White Shortbread

I have been shying away from some of the more frivolous cookbooks in my collection, and find myself returning again and again to the Leith's Cookery Bible. I quite like the way pages upon pages of it are filled with French sounding dishes I've never even heard of. The first chapters give advice on how to cater a buffet for 80 people and the basics of food hygiene. There are few pictures, and they are mostly pretty useless for the basic home cook - 3 ways to present apple flans?

Black & White Shortbread

I had a craving for shortbread, and I had some chocolate left over from the stall that needed using up. I love making shortbread, as it uses very standard store-cupboard ingredients. It's ideal for late night baking sprees when you can't be bothered to go to the shop. It's also easily jazzed up by whatever ingredients you have lying around (I'm quite a fan of citrus and herbs).

Two-tone Shortbread

As the chocolate helps seal in the moisture, these keep really well. Be careful not to leave them in a warm place, as the chocolate will melt. While this won't affect the taste, they might become a bit blotchy looking. The rice flour helps to keep the texture really "short", but if you don't have any, you can substitute it for more plain flour.

Black & White Shortbread (adapted from Leith's Cookery Bible)
Makes about 8

110g butter
55g caster sugar
110g plain flour
55g rice flour
100g white chocolate
100g dark chocolate

1) Preheat the oven to 170C.
2) Thoroughly mix the sugar and butter together.
3) Add the flour, and gently knead to make a smooth dough.
4) Roll out the dough on a floured surface, to about 5mm thick.
5) Use a biscuit cutter to cut out large circles. Reroll the scraps until you have 8 biscuits.
6) Put the biscuits on a tray, and chill in the fridge for 30 minutes.
7) Bake in the oven for 20 minutes. They should be starting to turn golden.
8) Cool on a rack.
9) Melt the white chocolate in a small pot. Use a pot that the biscuits will only just fit in to, as you want it to be as deep as possible.
10) Line a baking tray with greaseproof paper. Dip the biscuits halfway in the white chocolate, and place them on the paper to cool. Put the tray in the fridge if your kitchen is warm.
11) Once the white chocolate has hardened, repeat steps 9 & 10 with the dark chocolate.

Friday, 29 January 2010

Chocolate Brownies with Chestnuts & Figs

The only cookbook I got for Christmas was Ottolenghi. This was good, as my cookbook shelf is full, and I didn't want the usual semi-novelty cookbooks I usually seem to receive ('101 Biscuit Recipes' anyone?)

I had a packet of chestnuts in the cupboard leftover, so I decided to make Khalid's Chestnut & Chocolate Bars.
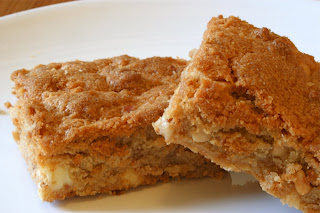
The digestive base was easy enough, and the chocolate mix for the top was also very simple, with the most strenuous part being chopping a large pile of chestnuts, figs and white chocolate. It went in the oven, and came out very, very, very wobbly. So it went back in the oven for another 10 minutes and was still wobbly. The recipe said it wouldn't be totally cooked, but I didn't expect it to basically look the same as when it went in. I put it in the fridge to see if that would harden it up. Maybe the chocolate would set solid.

A few hours later, it was still way too wobbly. I tried to turn it out of the tin (luckily I'd used a silicone one) but it was obviously going to end in disaster. I gave it another 10 minutes in the oven, but it was STILL wobbly! I shoved it back in the fridge as I was not in the mood to deal with a massive pile of fail goo at that moment.

The next day I was immersed in the domestic bliss that is the life of the self/un-employed. After warming up with bouts of bed making, laundry and sweeping, I decided to deal with the fail. I thought I might spoon some over ice cream and bin the rest.

It had set! I was not expecting that at all. A bit of a push and it popped out of the tin in one lovely firm lump, and sliced up with a crisp finish that is just so satisfying.

After all the abuse I'd put it through, I wondered whether it would taste any good. The chocolate mix was flourless, so although it was firmer than it should have been, it was still moist, almost like a giant truffle. The chestnut and the figs were there, but weren't as overpowering as I'd worried they might be, but not really that flavourful either.

Chestnut & Fig Brownie Bars

I guess I'll have to give this another go before I reject the recipe altogether, but I wasn't that impressed. It was just digestives with a eggy ganache on top, with no stand out flavours or textures. Not offensive, but just not that amazing either.

Wednesday, 27 January 2010

January Daring Bakers - Nanaimo Bars

The January 2010 Daring Bakers’ challenge was hosted by Lauren of Celiac Teen. Lauren chose Gluten-Free Graham Wafers and Nanaimo Bars as the challenge for the month. The sources she based her recipe on are 101 Cookbooks and www.nanaimo.ca.

I first discovered Nanaimo Bars while driving round the Canadian Rockies. I left mine in the car while checking out a lake, and it melted. When we got to Peyto lake, I buried it in some snow, and by the time I returned to the car, it was solidified again. Woo!

As well as being excited to make Nanaimo bars, I was also interested in gluten free Graham crackers. I've had a lot of requests for GF stuff on the stall, and I wanted to know what Graham crackers tasted like.

I couldn't find sorghum flour anywhere, and internet searches revealed that UK sorghum is rarely truly gluten free. Instead, I used more white rice flour to replace it.

The Graham crackers were otherwise uneventful. As mentioned in the recipe, the dough is very sticky and soft, and quite hard to work with. Despite flouring the surface loads, only 2 or 3 crackers out of each attempt were sturdy enough to make it off the worktop and on to the baking tray. Patience and a lot of re-rolling was necessary.

Graham Crackers

I didn't really like the taste. The honey flavour was a bit sickly, although the texture was very similar to digestives, which are often cited as the nearest thing the UK has to Graham crackers. I ground up the rest to use in the base of the Nanaimo bars.

I pretty much followed the recipe, except for the coconut. I failed to measure how much was left in the packet before writing the shopping list, so I only had half the amount needed. To make up for the missing coconut, I added in some oats as well.

Nanaimo Bars

The custard layer was incredibly thick, and it wasn't helped that the current weather meant that the kitchen as freezing, so the butter was very hard. I was worried that the custard powder made it taste chalky, but I hoped the other elements would make up for this in the finished product.

Finally, I topped the bars off with dark chocolate ganache. It was tricky to stop the warm chocolate seeping in to the custard layer, so it was important to cool the chocolate and work quickly to stop the custard melting. Once the chocolate layer was chilled, I turned out the bars and cut them in to shape.

Coconut, oat, almond & chocolate base, custard filling, chocolate topping.

They were just how I remembered. The sickliness of the Graham crackers was lost in the chocolate and coconut of the bottom layer, and the chalkiness of the custard had also disappeared. The chocolate topping mirrored the bottom layer nicely. Another great challenge from the Daring Bakers!


Thursday, 5 November 2009

Korova Cookies

This is a bit of a landmark here - my 100th post! Although really two of them don't count as the introduction and links should be on pages rather than posts... but anyway. I have filled this blogger text box out 100 times. Who knew I was that dedicated!?

T's brother and his girlfriend are visiting us this weekend. I have a bit of a reputation amongst T's family for being a baker, so I knew I had to make something to welcome them, but at the same time I didn't want to do anything too crazy that they would feel obliged to eat. I settled on Dorie Greenspan's Korova cookies (sometimes also known as "world peace" cookies - the idea being that if these were handed out there would be no more need for war). How could anyone resist buttery chocolate biscuits studded with chunks of dark chocolate?

Korova Cookies

I made the dough for these the night before, and left it to rest overnight. It was hard to resist baking some of them straight away for a midnight snack. In between cleaning the flat, I sliced off 12 rounds and baked them. Within minutes, the flat smelt like melting chocolate. Obviously I had to check they were ok, and had eaten 2 while they were still warm. By the time T had picked up his brother from the station, I'd eaten 7 of the of the 12 I'd baked. In the introduction, Dorie warns you not to make them when you are alone, and she is right. They are dangerously addictive.

Crumbly and crispy

So I baked another batch, and it came out of the oven just as T and his brother came through the door. They are crispy and just chewy when cool, but when they are warm, the crumbly biscuit and the gooey chocolate are sublime. The hint of salt and the dark chocolate also make them a little more grown up than your average cookie.

If you like the sound of these, Deb of Smitten Kitchen has already typed the recipe up rather well.

Sunday, 11 October 2009

Millionaire Shortbread with Salted Caramel

When I was at primary school, my class was selected for an academic survey. We had to fill out a questionnaire detailing our parents' level of education and various other lifestyle questions. I guess this was then correlated with our academic achievement to see if certain households were more likely to produce academically successful children than others. The reason I still remember this is that we had to write down how many books were in our house. I lost count after about 250.

My mum loves books, and sometimes buys random books just because she likes the look of them. She also has a magic ability to find books on special offer or discounted, and she recently sent me Harry Eastwood's "Red Velvet & Chocolate Heartache" as she was concerned that I eat too much cake!

Chocolate And Salted Caramel Squillionaire

There were quite a few recipes that appealed, but as I had a tub of caramel sitting in the fridge already, I decided to make the "Chocolate and Salted Caramel Squillionaire", which I then realised was the only recipe in the book that didn't contain vegetables. Oh well.

The addition of golden syrup to the biscuit base gave it a nice toffee flavour, and baking the base before adding the caramel and chocolate made it super crispy. I did think there was a bit too much biscuit base though, next time I would probably only use 250g instead of 300g of digestives.

I also liked using the salted caramel and really dark chocolate topping, as it counteracted the sweetness of the caramel and the base. They're a little bit more grown up than the usual millionaire's shortbread. Although the recipe says it makes 12, I cut mine in to 16 and they are still a decent size.

So yummy they make me lose focus...

I'm really excited to try some of the other recipes, although I agree with this review that the descriptions of the recipes can be rather annoyingly cutesy...

They don't last long.

Chocolate and Salted Caramel Squillionaire (Harry Eastwood - Red Velvet & Chocolate Heartache)
Serves 12

397g tin of condensed milk
100g unsalted butter (melted)
3 tbsp golden syrup
300g digestive biscuits
pinch of sea salt
150g very dark chocolate

1) Preheat the oven to 180C, and line a 22cm square brownie tin with baking paper.
2) In a large and sturdy pan, put the (unopened) can of condensed milk. Fill the pan with boiling water so the tin is completely covered. Boil for one hour, topping up the water as needed.
3) Meanwhile, put the melted butter and golden syrup in a bowl, and put it in the oven or in the microwave to melt the syrup and butter together. (Make sure the bowl is oven/microwave proof!) It won't take long, 5 minutes in the oven or 1 minute in the microwave.
4) Crush the biscuits, either with a food processor or by putting them in a plastic bag and whacking it with a rolling pin. Get them really crushed, so the mixture looks like fine sand.
5) Mix in the hot butter and syrup with the biscuits. It should now look like wet sand!
6) Push the biscuit mixture in to the tin, squashing it down with your hand or the back of a spoon. Prick the surface with a fork to let out any air bubbles, and then bake for 20 minutes until golden. Leave it to cool while the caramel finishes it's bath.
7) Carefully remove the tin from the boiling water, and open it. Mix in a pinch of salt, and then pour it over the biscuit base, making sure it spreads out to cover the whole base. Put it in the freezer to cool down for at least 20 minutes as you need the caramel to be set when you pour the chocolate over.
8) Melt the chocolate in a bowl over a saucepan of simmering water. Once it is thoroughly melted, pour it over the frozen caramel and biscuit base. Put it in the fridge to chill.
9) After the chocolate has hardened, cut in to portions and serve!

Sunday, 6 September 2009

Chocolate Chip Cookies

I'm still in limbo between flats, and I'd sworn off baking until we reached the new flat. However, with T passed out on the sofa watching Jonathan Ross, and this month's issue of Delicious already read, I was bored and the kitchen was calling.

Raiding the cupboards showed there was some flour, baking powder (no idea how T managed to obtain that, I must have bullied him in to buying it at some point) and a bar of chocolate left over from the chocolate terrine. I didn't have any cake tins or a baking sheet, only a roasting tin, so today was not the occasion to attempt the Daring Baker's back catalogue.

Instead I opted for a classic chocolate chip cookie, with hefty chunks of chopped chocolate. I reappeared from the kitchen 30 minutes later with cups of tea and a couple of freshly baked cookies. Not the most exciting Friday night, but certainly a tasty one.

Chocolate Chip Cookies

You can also save this dough in the fridge for a few days, so I baked up the rest of these this morning for elevenses.

RECIPE
115g softened butter
100g brown sugar
25g caster sugar
1 egg
1tsp vanilla extract
215g plain flour
1tsp baking powder
pinch salt
110g chocolate (cut in to chunks or chips)

Makes 24 cookies

1) Preheat the oven to 190c (Gas Mark 5)
2) Cream the butter and sugar until smooth, then add the egg and vanilla extract.
3) Add in the flour, salt and baking powder and briefly mix to form a dough.
4) Add in the chocolate and mix again to distribute the chips throughout the dough.
5) Divide the dough into 24 balls, and place on a greased baking sheet, lightly pressing each ball to flatten it in to a cookie shape. (At this stage you can store any extra dough in the fridge for a week or the freezer for a month.)
6) Bake for 10-12 minutes until golden. Transfer to a wire rack until cool. (If your cooling rack is in a self-storage facility, you can use the rack from a roasting tin that you found at the back of a cupboard)

Tuesday, 7 July 2009

The Graduation Bake-a-thon.

As it was graduation week, we have had various friends, relatives and randomers drifting in and out of the flat all week. In an attempt to be hospitable, we all chipped in to an ingredients pot and I went on a baking binge.
The lemon roulade was amazing, and the left over lemon curd is in the fridge. I haven't told my flatmates this yet as once I do it will not be around for long. The only trouble I had with this recipe was that the sponge broke up when I tried to roll it. Luckily I had enough lemon curd and mascarpone to stick it back together, but it looked a bit messy from the side.

Broken lemon roulade - tastes better than it looks

The carrot cake is one of my favourite ones, as it is so dense and moist. However, I made it in mini loaf tins as I wanted to freeze a cake for later in the week in case the first batch went stale/got eaten. As the mixture is so dense, it is prone to burning on top but still being undercooked in the middle. Luckily I managed to get away with it this time, but the cake was a little moister than I would have liked, and a little crispy on top. I also swapped out the walnuts for hazelnuts as I had them in the cupboard already.

Carrot cake with vanilla mascarpone topping

I have altered the Cupcake Bakeshop recipe, and never use the strawberries in the filling, partly because they don't add that much and partly because even in season they are so expensive! The buttercream icing on top is perfect. It's creamy and sweet but without being overpowering. The texture of the cake itself is nothing special, but when it has the ganache filling it is AMAZING. I have yet to give anyone this cupcake and for them not to fall in love with it.

I'd made the Korova cookies before, but this time I used white chocolate chips instead of dark, just because I'd messed up the shopping list and not bought enough plain chocolate to make these and the chocolate cupcakes. I also think I sliced them a bit thin as they were too crispy and a little tough. Still delicious though!

Roulade and Carrot Cake, boxes of cookies

Once again, me and caramel failed to get on. I burned the mixture and had to strain it through a sieve in to a fresh pan. I also didn't cook it enough for it to stay in the biscuits, so some of them leaked as the caramel was too runny. I also got the quantities completely wrong, so now we have a massive tub of caramel in the fridge alongside the lemon curd!

Overall, I think I need to plan baking binges better. I ran out of muffin cases and baking powder, but had way too many eggs. I tried to make things in an order to best maximise things like oven capacity and cooling racks, but if I'd thought it through better I would have made things like cookie dough in advance. I also need some more attractive display containers. The cake caddy is pretty awesome, but kind of utilitarian looking. Any ideas?

Friday, 29 May 2009

Rachel Allen's Mocha Cake

The funniest thing about running a blog is Google Analytics. The initial excitement that somebody other than me had read it, then finding out in map view that person is from Argentina! Apart from trying to collect a reader in every country (gotta catch 'em all) I love reading the search results. The most common search is for Press Coffee, although I get some very strange ones too. Try "I don't like eating with other people" and "Tania Tang". I have no idea who she is although she sounds dubious to me.

This post is dedicated to the person who searched for "Rachel Allen mocha cake review".

As someone with a rather large baking store-cupboard, the only ingredients I had to buy for this cake were fresh eggs and some butter. Usually I have some of them in the house but this time they had run out. Luckily, as E was craving cake (he was finishing uni that morning) he offered to pick them up on the way home from his exam.

The cake batter was simple to pull together, and "Bake" is rapidly becoming my book of choice for sweet treats. I couldn't be bothered baking a layered cake, as my sandwich pans are teeny, so to get a decent size cake I usually use the springform pan and wash it out between layers. However, the recipe gave alternate timings for cupcakes, so I went with this.

Mocha cupcake

The cakes cooked well, although I had to turn the pan to combat a cool spot in the front of the oven. The icing is a simple coffee buttercream. Usually, I pipe in a spiral inwards, but I'd seen online that piping in a spiral outwards from the centre created a rose petal effect. Seeing as E was going to snaffle these down with whisky and beer, I was sure he wouldn't mind if I experimented with the decor a little.

My roses were pretty poor, although for a first attempt I was impressed. I think with a little practice I might be able to produce something quite pretty. I also made a few traditional ones to take pictures of.

More Mocha Cupcake-ary

The cakes were generally light and moist, and kept well until the next day. The buttercream was very sweet, but went well with the cake. I've noticed buttercream gets a lot of "haterz" online, either as it is too sweet or too fatty tasting. I think if it's well whipped and spread sparingly it tastes great. (Plus, we're talking cake here, if you want something non sugary and fatty I suggest a salad.)

I think next time I will make this cake as a proper cake rather than cupcakes. As is the way with cupcakes, the icing to cake ratio was a bit off. Actually, the ratio wasn't too bad, it was the distribution. I like layer cakes as the icing is spread evenly, whereas the combination the cupcake shape and a small mouth means I invariably get icing up my nose, and one bite of icing followed by another solely of cake.

Monday, 25 May 2009

How to Make a "2" Shaped Cake, OR, My Very Own Cake Wreck

Soooo, I think I might have created a cake wreck.

My friend Anna turned 21, and went home for a big family party. At the big family party, a cake in the shape of a 2 and a 1 was produced. However, the family party was not very cake orientated, so only the 2 got eaten. Since the cake had been professionally made, it was encased in a thick layer of royal icing, so Anna brought the 1 back to Edinburgh for a second birthday party.

I had offered to bake her a fairy castle cake, like this one, but now as we had a 1 already, it seemed more sensible to bake another 2. (While on the phone to my mother, she told me that she had once attempted a fairy castle cake for my 5th birthday. Apparently it was less than successful and instead resembled the Hagia Sophia.)

I haven't really done much with fondant, and wasn't in the mood to try royal icing either. As the cakes weren't going to even vaguely match, I came up with the idea of combining the 21 with the fairy castle. It was very late at night and I wasn't in my right mind. The idea was that the 2 would form a path to the castle, which would be formed from the 1 cake.

I didn't have a two shaped pan, so we had to improvise. There wasn't a big enough mixing bowl, so we used a punch bowl instead. We made a basic chocolate sponge, involving 450g butter, 450g sugar, 8 eggs, 400g of flour, 50g cocoa, some baking powder and salt. From this, we made a circular cake, a loaf cake and a square cake. It took the best part of 5 hours as the oven in Anna's flat was tiny and could only fit one tin at a time.

After the cakes cooled, and we'd covered some chopping boards in tin foil (classy), we set about building and decorating out 2. The loaf cakes was sliced horizontally to be the same height as the circle and square cake. We cut these two in half vertically so that we had a semi-circle, a short rectangle, and a long rectangle.

The semi-circle formed the top of the 2, and the long loaf rectangle the main cross of the 2. Finally the rectangle made from the square cake made the bottom of the 2. We cut of the corners of the loaf cake and trimmed the semi-circle to make it all fit together better. The layers were sandwiched together with chocolate buttercream, and also given a thin crumb coating to make the spreading of the rest of the buttercream easier.

All was well so far. However, I'd forgotten to bring gel food colouring, so we had to use some liquid stuff procured from a nearby Tesco Metro. We forgot to get any more icing sugar to make up for it, so the buttercream was ridiculously soft, and we couldn't get it as dark as I wanted. I should have chilled it for a bit, but the bowl wouldn't fit in the fridge! Instead of looking like lush grass, it looked like the weird pastel green you get in hospitals. I also tried to spike the icing up so it looked grassy rather than smooth, but again it was too soft to work with properly.

Next I decided to ice the path to the castle in pink, like the icing on the other cake. Again it was hard to get the consistency right, and the colour was too weak. Plus as it was so soft it was impossible to pipe neatly.

Next we made a cobblestone path out of chocolate raisins. Again, the image I had in my head was far far above what actually occurred on the cake.

Finally, we topped it off with a cardboard cut out of a knight on horseback and a turret for the castle.

Behold the wreckage...!

Structurally sound, tasty inside, wrecky design

At the party, everyone thought it tasted great. I even overheard someone saying "The green cake tastes far better than it looks!" which I think is a sort of compliment. I thought it was a bit dry and dense compared to my normal baking style, but passable. I'm scheduled in for another "official" cake next week so we shall see how that one goes. I might attempt a buttercream plaque/transfer.

Monday, 11 May 2009

Real Food Festival

I am in London this weekend, partly to catch up with friends, but partly because I fancied a trip to the Real Food Festival at Earl's Court.

I booked tickets for the Sunday, and planned to go with my mum. However, she had to work on Sunday, so we decided to sneak in to the trade show on Friday. We had a deli-based cover story, but part of me thinks being a blogger now counts as "trade", especially when you see how many blogs get sent free samples as a promotion tactic. Anyway, enough of my views on whether exploitation of new media as free promotion is ethical or not.

A very extensive tea stall

It was an enjoyable day, and I learnt some interesting stuff about tea, and saw mozzarella being made. I also saw Willie Hardcourt-Cooze being filmed manning his chocolate stall, which was quite exciting. Sadly we missed Fergus Henderson doing a cookery demonstration, but we were too cheap to buy a programme and didn't realise he was on.

Mozzarella curds

Given my "expert" knowledge in food lies mostly within baking, I was particularly interested in the bakeries at the show. There were a couple of bread stalls that looked good, and some great Italian biscuits. The cake stall were generally disappointing, with cupcakes being a major theme. I like making these at home, but I think commercial cupcakes usually suffer from style over substance. On top of that, I even saw one stall that had such poorly iced examples on display that I would have rejected them if I had made them myself.

The real star find was PT's biscuits. Not only were his biscuits delicious, but they used proper ingredients like butter (rather than margarine or oil). The flavours were not particularly revolutionary, but it was great to look at the label and see the same list of ingredients as I'd use at home. No additives, preservatives, weird chemicals - home baked biscuits without the hassle! I also chatted with him for a while and he gave me loads of free samples. I truly believe good baker is a generous one! I hope Paul succeeds.

Cyrus Todiwala

Despite having a great day pretending to run a deli, I still had tickets for Sunday. So I went again with my friend C! We watched Cyrus Todiwala make an Indian meal, before wandering around the stalls. I had a nice hazelnut ice cream, and a pear and cardamom cupcake from one of the more professional looking stalls. The pear filling added moistness, but the icing had dried out a little. The cardamom flavour was also too weak, and the cake mainly tasted of sugar. C had an espresso cupcake that was a bit more successful.

Pear and Cardamom cupcake

Espresso cupcake

We also managed to get a spot at the Bordeaux Quay cookery school stand. We made a fennel and courgette salad, and a cheese omelette. Our omelette was a bit runny, but the salad, which also featured garlic, pine nuts, sultanas, coriander, mint and lemon was delicious. Raw fennel and courgette didn't excite me at all, but the end result was very tasty.

C showing off her chopping skills

The finished salad

My other top find was a Welsh chocolate maker called Hipo Hyfryd. They are nominally vegan, but really in the case of chocolate this just means plain chocolate rather than milk. I got a box of the salt and pepper flavour, which was really unusual and much more interesting than some of the other chocolates on offer on other stalls. I think it might be trumped by lime chocolate in terms of weirdness, but lime chocolate didn't work while salt and pepper most definitely did. Again, they seemed like nice guys and I hope they do well!

I had a really good day on both my visits, but I felt that the show would have benefitted from something a bit more "showy". Most of the festival was a glorified farmer's market, with some of the stands being quite big names, rather than smaller "real food" producers. Although it was great to meet the people who made the food, some stalls had employed temps, notably Rococco chocolate, were most of the girls behind the counter were unable to even speak English, let alone tell you about the chocolate you were tasting. I really enjoyed the cookery school, and the demonstration kitchen, so I think the focus should shift from being about market style stalls to more interactive/instructive elements.

I am such a nerd.

Friday, 1 May 2009

Red Velvet Cake


Fluffy

I think my big downfall as a cook is that I don't revisit recipes enough. I'm always distracted by something new and shiny, and don't spend time getting a small selection of recipes right.

So when I decided to bake a cake for this weekend, I didn't go for an old favourite, I went for Red Velvet Cake.

I'd never really heard of this cake until recently. A lot of the blogs I frequent are American, and it pops up fairly frequently. I found it strange that a basic chocolate cake could get people so excited, seemingly just because it had food colouring in. When I found a recipe for it in "Bake" by Rachel Allen, I had to see what the fuss was about.

It was fairly complicated to make, as cakes go, as it involved alternating between wet and dry ingredients. While I managed to find buttermilk in a local deli, I couldn't find cream of tartar anywhere, except for in the Co-op, where I found a ticket for it on the shelf, but they'd sold out. As it was just in the icing to make the mixture more acidic, I replaced it with a few drops of lemon juice.

The cake took me quite a while to make, as my flatmates were watching tv and I didn't want to use the noisy electric whisk. This is one of the many joys of living a shared flat with a kitchen diner instead of a proper living room! I used a spatula to cream the butter and sugar, which took a while, then fold in the other ingredients. There was also a bit more mixture than I was expecting, so the mixing bowl threatened to overflow towards the end!

I turned the sandwich pans after 20 minutes in the oven, and at this stage they were noticeably wobbly in the centre. They rose quite a lot, but sunk as they cooled so they were only slightly domed, although if I was making this for a special occasion I would probably level them off so they looked a bit neater and more professional. As it was, I just filled in the gaps with the icing.

The icing was easy to make, although I've never made a meringue based icing before. I wasn't sure how much the icing was meant to be heated, but it seemed to come together ok. This is another problem with trying new things - I often don't know what result I'm aiming for! On eating, the mouthfeel was a little grainy. I think I probably should have heated it more, but I was worried that the eggs would be overwhipped and collapse. I iced it once with a thin layer to catch the crumbs and then thickly with little flicked peaks.

My cake looked quite similar to the one in the book, so I think I got it right. My American flatmate was the only one in the flat who had tasted red velvet before, and he confirmed that it tasted as it was supposed to.

Very red

It was pretty nice, with the only flaw being the slightly grainy icing where the sugar hadn't dissolved fully. However, I just don't get the appeal of red velvet cake. The cake was moist and soft, with a definite chocolate flavour, but I didn't like the icing though, and found it sickly. I thought it would have been much better with a chocolate icing. The red colouring impressed my flatmate H, and the red and white contrast looked good, but I think the novelty would wear off quickly. (H also said that syphilis was known as "French velvet" during the 18th Century so her opinions may be slightly skewed.)

A piece of cake...(I'm hilarious)

In terms of revisiting this recipe, I think I will make the cake again, but not bother with the food colouring or the icing. Instead I might try a chocolate fudge icing or a ganache. I guess you could also dye it other colours for special occasions, although I can't think of any right now... maybe green for St Patricks? Blue velvet?

Monday, 13 April 2009

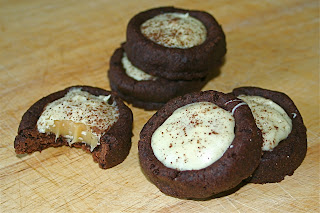
Salted Caramel Mocha Cookies

In Delicious. this month there is a was an advert for a coffee machine which came with an recipe for cappuccino thumbprint cookies. This got me thinking, and I suddenly became obsessed with adapting the recipe to make salted caramel mochas.

I followed the dough recipe pretty closely, only making a couple of changes to the method. It was the filling that really took time and experimentation. I wanted to make a creamy caramel, much like you get inside a Twix or a Mars bar. Using Leiths, and various online recipes, I made four batches of caramel. All of them were rubbish. The first couple burned, even though I was using a sugar thermometer. The second two I was much more careful with, and took them off the heat well before they were anywhere near burning point. I tried stopping one with cream, but instead it just turned in to a giant lump of hard sugar and some slightly dubious looking brown cream. The next batch I used a combination of milk and butter. This had a better consistency, but was a very dark brown and instead of being smooth and creamy, had a weirdly grainy mouthfeel.

4 attempts at caramel meant that I had run out of sugar, clean saucepans and dairy products. My fingers were covered in tiny burns from boiling, spitting sugar, and I was getting frustrated. Why was boiling some sugar so difficult? I was being attentive, monitoring the temperature, and not stirring too much. The part of me that thinks I am a good cook suggested that it was a combination of a dodgy electric hob and a cheap, thin saucepan. The part of me that wants to be a good cook thought I was probably stirring too early, heating too quickly, and getting distracted too easily.

While searching online, I found a recipe for millionaire's shortbread. Looking at the picture, it seemed that was exactly the type of caramel I was looking for. A baking community I posted on also suggested a similar recipe. I noted down the ingredients, and went to bed. That night I dreamt of caramel. All of my dreams featured it in some way. I dreamt of bubbling sugar, liquid in the pan but solid on the counter. I was surrounded by vast containers of dark, burnt toffee, with curdled cream and butter floating on top. Finally, I dreamt of the millionaire's shortbread, and the promise of a perfect, mellow, soft caramel, interspersed with the crunch of vanilla sea-salt.

The next morning, I couldn't wait to get out of bed. This is a very rare feeling for me! I went off to the supermarket, stocked up on sugar, butter and condensed milk. I was going to crack this today.

I mixed up the ingredients in a pan, playing slightly with the quantities. I stirred as the butter melted, then stirred as I added the sugar and the golden syrup. I kept stirring as I added the condensed milk. And stirred, and stirred. Slowly the texture began to thicken, and the taste became more caramelised. Then some brown lumps appeared. The baking community had warned that it would catch easily. NOOOOOOOOOO!

I whipped it off the heat, and strained it in to a new pan. Luckily, there were only one or two burnt specks, which got caught in the sieve. I turned the hob down to the lowest heat and stirred some more. I stirred for a full 30 minutes. I wasn't even convinced the mixture was thickening properly, and the colour didn't appear to be changing either. Still stirring, I reached over to the sink to get the sieve and the used pan. Only then did I realise how brown my mixture was! The old saucepan was a eggy yellow, but the one I was currently stirring was the colour of tanned skin after a good day at the beach (not my skin though, then it would have been a violent red).

Doing a little victory dance (but still stirring) I poured the caramel in to a bowl. While warm, it was fairly liquid, when cooled it was almost solid, but still pliable. Perfect.

Maybe when I have a kitchen with natural light I will be able to take good photos.

Salted Caramel Mocha Cookies.
Makes 40

Preheat the oven to 180C.

Mix 285g plain flour, 100g cocoa powder, and 2tsp of sea salt in bowl, with 2tbsp ground coffee.

In another bowl, cream 225g unsalted butter with 285g caster sugar. Mix in 2 egg yolks and 2 tbsp cream. Once combined, add in the flour cocoa mixture. Stir gently until combined, then turn out on to a work surface and knead until you have a smooth dough.

Divide the mixture in to 4, and then make 10 small balls from each of your quarters. If you don't want to make the 40 cookies, you can keep the dough in the fridge for a week, or the freezer for a month. Put the balls in the fridge for 2 hours to harden up. If you try to bake them straight away they will spread too much and break up.

Form each of the balls into a shape like a pie shell. You want the edges to be fairly thin, but not so thin that they will crack in the oven. About 5mm is ok.

Bake in the oven for 10 mins, and then cool on a rack. If any of the holes for the filling have risen, then push them down while still soft. While the shells are cooling, make the caramel.

Melt 180g unsalted butter in a saucepan over a low heat. When melted, add 75g caster sugar and stir until dissolved. Then add 2 tbsp golden syrup, and stir until combined. Finally, add in a can (397g) condensed milk, and stir continuously. When the mixture is golden and thick (and tastes caramelly) remove from the heat into a clean bowl. Stir in sea salt to taste. I used about 30g of vanilla sea salt, but I like my caramel SALTY.


Filling the shells

Once the caramel has cooled slightly (but is still liquid enough to pour easily) and the biscuit shells have hardened, fill the shells with caramel. Mine took about a tablespoon of caramel per biscuit.

Lots of filled shells

Finally, melt 200g white chocolate and spoon this over the caramel, smoothing out the edges so the caramel is hidden. Make it pretty with a dusting of cocoa powder.

Thursday, 12 February 2009

Neglect

I am sad that I haven't been able to spend enough time on here lately. Everything has happened at once and I have been quite ill. I knew it was bad when even the thought of food didn't excite me anymore.

I am feeling a bit better now, although I am fairly sure I will miss the dissertation deadline. You can't get an extension and have to gamble that your excuse will be accepted and they won't slap a late penalty on you.

I am making baked hot chocolate to cheer myself up.

Sunday, 1 February 2009

Raw Food

We went for a walk to Stockbridge, which we had heard was a bit fancy, to check out the area. I've got a graduate job in Edinburgh in September, so I wanted to see where normal people lived as I've always stuck to the student end of town.

While we were there, we stopped in Red Sugar for a coffee. It's a raw food cafe, run by a pair of nutritionists. The premise is that cooking food destroys the nutrients within it, and it is better to eat food that is only warmed to about 40C. Luckily the coffee was an exception and was made with boiling water.

The other gimmick was that there were no additives, and everything was vegan. We got soy milk in our lattes, and sweetener instead of sugar. I forgot to ask what the sweetener was, I suspect it was fructose rather than Splenda or some other chemical substitute, but I found this a little strange. Sugar is made from sugar cane, and although white sugar has been processed intensively, brown sugar is fairly simple product, with minimal processing. I've had raw sugar cane before, and it was pretty tasty, and I can't see how it can be worse for you than any other naturally occuring sugar. I don't understand why extracting sugar from cane is bad, but extracting it from fruit is ok. I guess there might be some nutritional differences, but I would expect these to be minimal. Google reveals that turbinado sugar has roughy the same amount of calories as fructose, so I don't really know what they were aiming for here.

I don't think I've ever had a soy latte before, and I was pleasantly surprised. I really couldn't taste any difference between this coffee and a standard one. Although I found the logic behind the sweetener iffy, it did the same job as sugar in this case.

I really wanted to try one of the cakes, which looked delicious. I'm not sure exactly how they were made, but it was quite interesting trying to figure out how they could make cakes without heating the food. I read on their List review that they use a dehydrator to make flatbread, so I guess they could use this to make pastry too, and then have fillings that can set through chilling.

In the end, we got two Booja Booja raspberry truffles. These were also vegan friendly, and used cocoa beans that hadn't been roasted (and ths counted as "raw"). They were pretty tasty, and if I was a vegan I'm sure I'd love them. However, as an omnivore, it was too obvious that they'd used coconut oil in an attempt to recreate the natural creaminess of properly roasted beans. The chocolate had quite a strong coconut taste, although this might have been in the raspberry centre rather than just the chocolate. The raspberry centre was really good, the flavour of raspberry was strong, and the texture was creamy. I pulled a bit of chocolate off the raspberry to taste it on its own, and wasn't overly impressed. It was dry tasting, and although it was dark, it was still quite sweet. I think if you had food allergies, or were vegan, then this is a really decent substitute, but I think the flavour and texture compromises needed to make this "raw" weren't worth it. I can cope with eating raw vegetables for better nutrition, but I doubt very much that anyone eats chocolate for its nutritional value!

I would be interested to go back to eat a meal, rather than just having coffee. The decor was quite modern and smart, which makes a change from other vegan places I've been, which tend to look a bit rundown and messy. This isn't a bad thing, and sometimes it is nice to eat somewhere that feels like your hippy mate's living room, but sometimes it takes away from the "treat" element of eating out. I think the only other vegan/vegetarian place I have been that made a similar effort with decor is David Bann. I'm trying to eat less meat, partly for health reasons and partly because I am poor and vegetables and tofu are cheap. I might head back to Red Sugar for lunch in a few weeks when the dissertation is done and I have more time to investigate the whole raw food thing.

Thursday, 22 January 2009

Peanut Butter and White Chocolate Blondies

I finally got round to making the Peanut Butter and White Chocolate Blondies I'd bookmarked in Rachel Allen's "Bake" over a month ago.

I changed the recipe slightly as I used unsalted butter and added a little sprinkle of vanilla salt at the end.

Mixing the blondies

As I'd left the butter and peanut butter at room temperature, it was soft enough to mix with a spoon rather than get the electric-whisk out. As I didn't want to make it too bread-like, I was also keen not to over-process the flour too much.

Fresh out the oven

Blondies are like brownies but without cocoa powder or chocolate to make them dark. I baked them for 30 minutes, but I think on reflection they were a bit biscuity around the edges. Next time I'd go for 22-25 minutes so they go fudgey instead.


The other problem with them was the white chocolate. I'd chopped it to a medium size but it melted away and you didn't get the discernible chunks that I wanted. I'd make it with bigger chunks next time, perhaps just breaking the bar in to squares and then halving them.

Finished product

I served these at a dinner party held by my flatmate, and they would have been great with some ice cream on the side. Unfortunately it was a bit of a last minute thing so we hadn't stocked up on ice cream and other goodies. I saved a few to have to myself, and fed some to T when he came round to do some DIY for me. They tasted best warm straight out of the oven, but they held up pretty well stored in some tupperware for a couple of days. I really liked the crunch of the peanuts compared to the soft cake, and it would have been better with some creamy bits of white chocolate thrown in there too!

As I'd made my own vanilla salt from sea salt crystals and an vanilla bean, there was an occasional crunch of salt too. I am a big fan of the salty/sweet combo so I really liked this element, although as the peanut butter had salt in it I only put a little in as I was scared of making it too salty. I'm sure you can get low-salt peanut butter at the health food store so next time I might buy this and control the salt myself.

They are probably pretty unhealthy but they were tasty so I don't feel too bad...

Tuesday, 30 December 2008

Chocolate Terrine

In preparation for celebrating New Year's Eve, I made a chocolate and vanilla terrine. A terrine is so called after the earthenware dish is it cooked/made in, and is not a specific type of dish. I've never made a terrine before, although I have made a layered chocolate mousse, and would be quite interested to make a meaty one that needs to be cooked.

The technique for the terrine was fairly straightforward, and was nothing I hadn't done before. As I had a lot going on, it was a bit chaotic in the kitchen, so I messed up some stuff that I really shouldn't have.

The tin wasn't lined too well, so the outside of the terrine had lots of wrinkles and cracks in it. Luckily once it was sliced these didn't show up too much. The second accident was while making the white chocolate mousse, I accidentally let the pan boil dry under the melting chocolate, which melted the side of my mixing bowl! Luckily I caught it before the plastic got through to the chocolate, so the damage to the bowl is only cosmetic. I had to reheat half the dark chocolate mix to top off the terrine, and I did it in the microwave as the mixing bowl was in use elsewhere. I think I must have overheated it a bit, as when I ate a slice this evening it was grainy. It wasn't too bad, but when you compared it to the other dark chocolate layer it had a noticeably different texture, despite being from the same original bowl of chocolate. Lastly, I forgot to bring a whisk with me, and T's kitchen is (in my opinion) not the best equipped! I think if I'd been able to whip the cream rather than just pouring it in straight from the carton it would have been a more stable product.

Despite these setbacks, the final dish was quite tasty and I've eaten a couple of slices already!


Sunday, 21 December 2008

Truffles

For Christmas, I decided to make boxes of truffles to give to people. I made some a while back, but they were plain ones just coated in cocoa. I was ready to be a bit more adventurous this time. I decided to make 5 flavours: Baileys, champagne, cappuccino, praline and plain.


After gathering a rather large quantity of ingredients (including 12 bars of chocolate!) and raiding the cupboards in my mum's house, I got to work. The first job was making the praline. I used this recipe although I only followed the praline section and used other recipes for the final truffles. It was pretty simple, and was a basic caramel of sugar and water with chopped hazelnuts added at the end. However, since the caramel cake the other week had suffered from crystallized caramel which I had to separate, I was super careful this time about not stirring it too much and regularly brushing down the sides of the pan with cold water.

Making the caramel syrup

Once the caramel started to turn brown, I added the nuts and poured it in to a lightly oiled tin to cool.

The praline as it cooled

Next up was making the basic truffle mix. I combined several recipes, and even then did my own thing for the flavourings. I used a recipe from Green and Black's for the ganache base, and then used this recipe from Suite 101 to get a guide on how to flavour them.

825g of chocolate!

I was planning to make 4 large boxes, one for my mum, dad, next-door neighbours and T's parents. The Green and Black's recipe made 36, so I tripled the quantity to get enough (plus a few extra for me to sample...)

Melting the chocolate over a pan

I melted all the chocolate in a bowl over a pan of simmering water. This took quite a while as there was so much! Once that was done, I added the cream, and split the mixture into 5 bowls, one for each flavour. For the Baileys one, I added a whole Baileys miniature, as adding a small amount didn't seem to give much taste. Similarly, the champagne truffle mix (strictly it was Cava but who can really taste the difference in this context?) didn't seem to take on much flavour. Reading up about it since, I think I should have used Marc de Champagne as well as fizz to give it a more intense taste. The coffee truffles were fairly simple to do, and only a couple of teaspoons of espresso gave a good flavour. For the praline one, I whizzed up the praline in a blender until it was very finely chopped, and added a few spoonfuls of this until the melted chocolate had some taste as well as a bit of crunch in it.

Chilling the 5 flavours

Once all the flavours had cooled, I attempted to shape them into balls. This was not easy and my hands seemed too warm. Everytime I tried to shape the ganache it seemed to melt away. I also tried using a melon baller. In the end, my mum helped me , using a combination of hand rolled and melon baller, as we worked out that the only way to do it with such a large quantity was to work in batches and constantly return the mixture to fridge once it become too soft. Eventually we ended up with 5 trays of vaguely spherical truffles.

My original plan was to dip the truffles in melted chocolate, but I didn't have enough to be able to submerge them fully and quickly remove them. This meant that I had to roll them in melted chocolate, which wasn't ideal as they would start to melt instead of taking on a shell of hard chocolate. Instead, I lined them up on a tray and poured the melted chocolate over the top. This wasn't perfect, as there were gaps in the enrobing, and it would have been better to do it on a wire rack so excess chocolate could drip away. However, I eventually managed to complete all the chocolates. I decorated each type differently so they could be identified in the box.
  • Plain - Piped in to swirl shapes with cocoa dusting
  • Cappuccino - White chocolate coating with cocoa dusting
  • Champagne - White chocolate coating with sugar dusting
  • Baileys - Milk chocolate coating with dark stripes
  • Praline - Milk chocolate coating with crushed praline topping
Baileys truffles

Praline truffles
Champagne truffles being trimmed

The problem with doing the coating on a baking sheet was that when it was time to pack them in the boxes they were a bit messy around the base, so I had to trim each one with a knife to get a smooth edge. I packaged them all up in petit fours cases, and packed them into three layered chocolate boxes.

Packing the chocolates (Cappuccino and a plain truffle)

For a first attempt I was quite happy with how they turned out, although they weren't as pristine looking as I hoped. I would try these again, and would quite like to go for some more adventurous flavours next time.