Friday 23 April 2010

Wednesday Night Pizza

One of the things I dread most is a dinner rota. It's Tuesday, it must be spaghetti. Thursday night is curry. And Sunday? Sunday is the dreaded roast dinner, with the same meat and vegetables as we cooked badly last week.

Individually, there's nothing wrong with any of these for dinner. The banality comes from the inevitably of the same seven dishes wheeled out each week, rather than the food. Back in catered halls, I was initially impressed with the variety and quality of the menus. It was only after a few months when vegetable bake rolled round yet again that I began to dismay.

We didn't have a full rota when I was child, but there were some days that had dinner assigned. Saturday would be fajitas (My father eats everything with a knife and fork, even fajitas. He would go out on Saturday nights so we would take the opportunity to eat with our hands.) The horror of the Sunday roast, followed by a light dinner of taramasalata and pitta bread.*

I looked forward to Wednesday though. Wednesday was pizza night. My dad always cooked on pizza night, using a slab of stone to get extra heat in the oven, and gently pushing the dough to fill the pizza trays. I'd help make the tomato sauce, or mix the dough. I'd be first to volunteer for cutting up the kabanos, sneaking the end slices in to my mouth when I thought no one was looking.

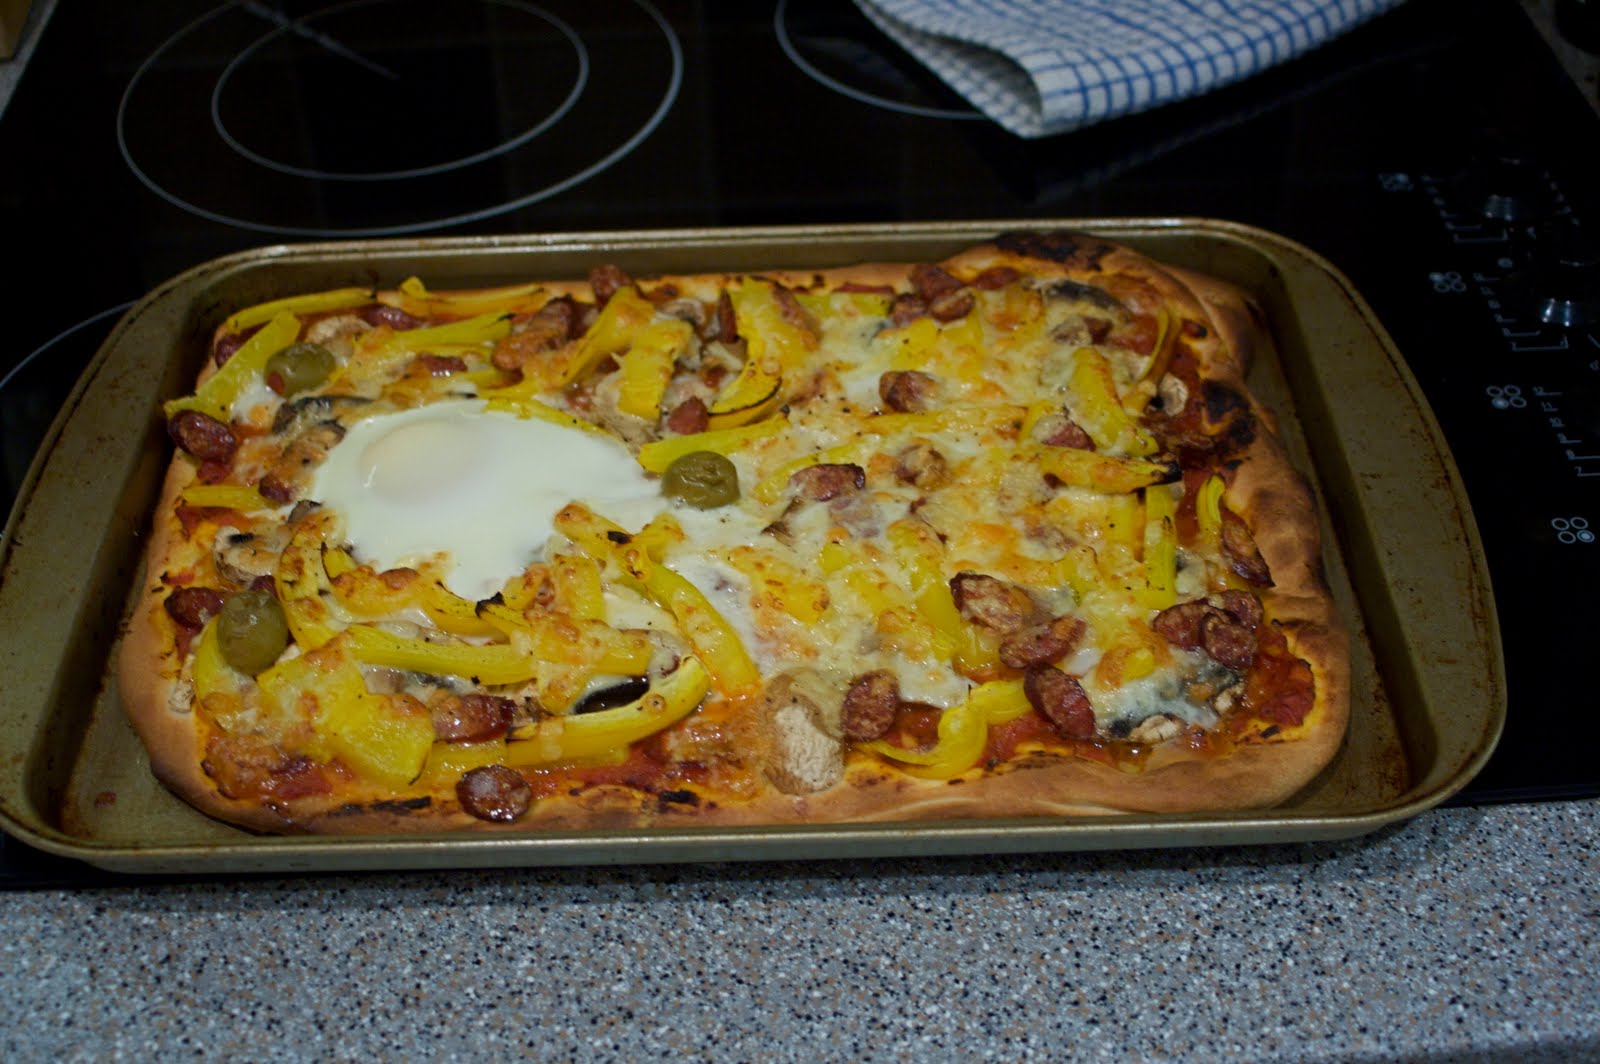
Pizza with peppers, kabanos, olives, mushroom & an egg.

This recipe is far from authentic. It features the aforementioned kabanos (usually we'd buy it from the Polski Sklep, but in this part of Scotland I have to make do with ambient kabanos. Nice.) and a tinned tomato sauce. I'm sure most Italians would probably laugh in disgust. It's invented by a man who hadn't tasted pizza until his late twenties, and garnished with whatever leftovers can be scavenged from the salad drawer.

Ambient Kabanos. Next week - trance wiejska

*looking back, I realise this is quite a weird thing to have for dinner once a week for around 10 years.

Wednesday Night Pizza
Serves 2

Dough
175g plain flour
pinch of sugar and salt
1 tbsp olive oil
1 tsp dried yeast

1) Place all the ingredients in a bowl, and add a splash of warm water.
2) Mix until a smooth dough is formed - you may need to add more water.
3) Knead for around 5 minutes until soft and supple. Place in a oiled bowl, then cover with a damp cloth. Leave to rise for at least 30 mins.

Tomato Sauce
1 small onion
1 clove of garlic
1 tsp anchovy paste
1 tbsp tomato puree
1 can of chopped tomatoes
Sprinkle of dried oregano
Salt and pepper

1) Chop the onion and garlic as finely as you can. Gently fry them for 5 minutes, until soft but not coloured.
2) Add in the anchovy paste and tomato puree. Cook for 1 minute.
3) Pour in the chopped tomatoes, oregano and season.
4) Bring the pan to a gently simmer, and stir occasionally.
5) The sauce is ready once it's very thick and the chunks of tomato are almost totally broken down. Dragging a spoon through the pan should leave a clean line. This usually takes around 20 mins.

Thick tomato sauce

Toppings
I like kabanos, peppers, anchovies, capers, fresh egg, olives, mushrooms and mozzarella. Not necessarily all at once.

Assembly
1) Preheat the oven to the highest setting.
2) Gently stretch the pizza dough over an oiled baking sheet*. You'll need to prod and poke it in to place. Make it slightly bigger as it will shrink a little as you put the toppings on.
3) Spread a thin layer of sauce on the dough, and add your toppings.
4) Blast in the hot oven for 8-10 minutes.
*If you are really clever, you can stretch the dough on to a floured plate, and slide it directly on to a scorching hot baking sheet. This makes for a crispy crust, but runs the risk of your pizza disintegrating in to a heap.

Monday 5 April 2010

Rhubarb & Ginger Ice Cream Tart

I wanted to make something with rhubarb and ginger, and I was feeling inspired by the DB tian last month. I still had some of the pastry discs leftover (they keep really well), so I decided to make something a bit similar.

I stewed a little rhubarb, and then stacked this with plain ice cream (not vanilla, plain. It's amazing.) stem ginger and one of the pate sablee discs.

Rhubarb & Ginger Ice Cream Tart

It wasn't the prettiest dish, but it was so tasty. I loved the texture of the crispy pastry against the soft the ice cream and rhubarb. The spiciness of the ginger balanced nicely with the ice cream, and the tartness of the rhubarb.

None left

Thursday 1 April 2010

Easter Cake

Having not one but two wedding cakes to make in the foreseeable future, I thought I should probably learn how to deal with fondant or royal icing. We were also visiting T's parents for Easter weekend, so I took the opportunity to make a bigger cake than I would normally and palm some of it off on them.

I started with the Simnel cake in from the April edition of Delicious. I didn't read it through before baking it, so I didn't realise you had to bake a layer of marzipan in to the cake. I didn't have any marzipan, and I don't like the stuff, so I skipped this step. I thought this might make the cake a bit dry, so I soaked the cake in marsala, lemon juice and sugar syrup before icing it.

I initially planned to do royal icing, but life got in the way and I ran out of time to do the icing in stages. Each stage has to be left 24 hours to dry, and I only had one afternoon. I went for fondant instead.

Trusty old Leith's came out. Syrup was boiled to the soft ball stage, then kneaded on the worktop with a spatula. It then stuck to the worktop, and made such a pathetically small ball of icing when I did prize it away that I gave up and binned it. Then I spent 15 minutes chipping the remaining sugar off the worktop with a knife. On the plus side, they played "Sit Down"by James on the radio and I still know all the words. That makes me feel very old indeed.

I decided to give another recipe a go before giving up and buying ready-made icing. This was much more successful; soon I had a rather large ball of sugar paste, and a kitchen covered in icing sugar. It took me several attempts to roll the icing out large enough to cover the cake, as it kept sticking. I only used icing sugar, but with hindsight I should have used some cornflour too to make it stick less.

Once I'd done the cake, I smoothed off any bumpy bits and tears with wet fingers and a paring knife. Classy.

I dyed the remaining icing into several colours to decorate the cake with, and went crazy with some miniature cutters I was given at Christmas.

Fondant confetti shapes

They were still a bit dusty at this point from the cornflour, but I'll brush that off later when it's hardened.
Fondant chick

I had loads of icing left over so I tried to make a hatching chick. The egg part fell to pieces but the chick survived.

Easter Confetti Cake

Given that this is my first time making this type of icing, as well as my first attempt to cover and decorate a cake, I feel quite chuffed. The surface isn't entirely flat, and the shapes aren't uniformly spaced, but it looks like vaguely good.

Fondant Icing
Makes enough to cover & decorate a large cake.

450g icing sugar
50g glucose
1 large egg white
flavours and colours
cornflour for dusting

1) Put the icing sugar in a bowl, sieving it if it's very lumpy. Make a well in the centre.
2) Add in the egg white, glucose and any flavourings and colours you want to use (such as lemon, orange flower, peppermint etc).
3) Knead the mix in to a smooth dough.
4) Dust a large surface with icing sugar and cornflour, and roll the icing to the desired shapes.

TIPS
- You can use the white icing to cover a cake, and then colour and flavour the offcuts to use as decorations.
- A drop of blue colouring makes white icing seem even whiter.
- Keep the icing in an airtight bag or covered with a damp cloth when you are not using it - it dries out quickly.
- If it does start drying out, add a drop of egg white or water to the paste to make it more malleable.

Friday 26 March 2010

Orange Tian - March Daring Bakers

This month's challenge almost totally passed me by, and it was only last week I remembered I had to do it!

The 2010 March Daring Baker’s challenge was hosted by Jennifer of Chocolate Shavings. She chose Orange Tian as the challenge for this month, a dessert based on a recipe from Alain Ducasse’s Cooking School in Paris.

Again, I didn't feel very inspired by this recipe. As a child, I always thought my Dad was strange for not liking creamy desserts, but in the last few years I've started to agree with him. Whipped cream in particular sets my teeth on edge. (I still love clotted cream though, no worries there.) This particular challenge contained a rather large whipped cream element.

Anyway, on I ploughed. The whole point of Daring Baking is to try something you wouldn't otherwise. First up was the pate sablee. This is basically an enriched shortbread, so it forms a very crumbly, crispy pastry when baked. This came together pretty easily, although I had to chill it for over an hour before it was strong enough to work with. As I only wanted to make a couple of tians at most, I halved the recipe, cut out 4 large circles and cut out several smaller circles to make petit fours with. As soon the pastry came out of the oven, I recut it with the plating ring to ensure it was the right size and hadn't spread too much.

Pate Sablee: tian discs at back, petit four discs at front.

We had to make marmalade to use as a layer. I'd already made some Seville marmalade earlier in the year, so I melted some of this down with extra sugar and juice to create a slightly sweeter version that was more suitable for the dessert.

Sweetened Seville Marmalade

Next was the caramel. I have yet to make a successful caramel. Although this one didn't burn, it was way too runny, and was a little bitter. One day, I will conquer caramel. Not today though.

The bit of this challenge that I found most useful was learning how to segment an orange before. A video showing how was posted, and after watching AWT mumble away I managed to do a pretty good job. This is actually quite a useful skill for me, as I love oranges but often avoid them as I hate the pith. (Weirdly, my favourite dessert as a child was orange segments with Cointreau cream. My Mum thought this was ok but watching ITV wasn't. She obviously stopped reading the parenting book before the booze chapter.)

Finally the dreaded whipped cream. Gelatine was added, along with some sugar to stabilise the cream. I didn't find the cream much different, except now the texture was gluey as well as foamy. Ick. We were meant to fold in some of the marmalade at this point, but I opted for a shot of Cointreau instead. If anything was going to make whipped cream with ground up beef bones better, it would be booze.

Orange Tian

The final stage was assembling the dessert. Orange segments went on the bottom, then cream, then a pastry disc spread with marmalade. The whole thing went in the freezer for 10 minutes to harden up a little. Once inverted on to a plate, a little caramel sauce was drizzled over the top.

The final verdict was mixed. I loved the orange segments, and the crispy pastry was a nice contrast to the rest of the dessert. It was let down by the slight bitterness of the caramel and the sickly cream; I ended up being glad that I'd only made one. In future, I'd replace the whipped cream with Cointreau ice cream, or a thin layer of clotted cream. I like the tian idea for desserts in general, and it was quite fun assembling it upside down.

You can see the full recipe here.

Indulgent Chocolate Mousse

Part of the reason I find myself flipping through Leith's quite so often is that it's great for basic recipes. It's Delia for people who know how to boil an egg. After a batch of meringues left me with several egg yolks, I sought out a recipe for a classic chocolate mousse.

Rich chocolate mousse - unfortunately I ate it before I could photograph the bubbles.

The 'classic' recipe used whole eggs, so I opted for the 'rich' version instead. It was pretty simple to make, although as usual, me and boiling sugar do not get on. The recipe calls for the sugar syrup to be boiled to short thread stage. The suggested way of testing this is to dip your fingers in the sugar and see if a short thread is formed. I didn't fancy putting my hand in boiling sugar (I have definitely been there and done that) so I got the ancient sugar thermometer out instead. Annoyingly, while 'crack' and 'softball' were marked, short thread was not.

I figured that if Prue Leith was telling me to stick my hand in boiling sugar, it can't be that hot. I boiled it to around 80C, although finding the sugar syrup table in the book later (why is it not indexed?) I found out that short thread stage is actually 108.3C. So there.

This probably explains why my mousses were a bit denser than I'd expected, as the syrup and egg yolks didn't fluff up as much as the book said they would. They were still pretty damn tasty, and I filled 5 ramekins with a gloriously thick chocolate goo. I used very dark chocolate, and I think in recipes like this, it is a travesty not to. The chocolate gets watered down with cream and sugar during the process of the recipe, so using a milky chocolate to start with will just dilute it even further. You'll basically have a homeopathic chocolate mousse, and that's not going to cure any ills.

With hindsight, I think it might have been nice to swirl a bit of raspberry puree through as well. It is very rich, so a bit of fruitiness would balance that well.

Rich Chocolate Mousse (Adapted from Leith's Cookery Bible)
Makes 4-6 depending on ramekin size

70g granulated sugar
110ml water
3 egg yolks
170g very dark chocolate
300ml double cream

1) Heat the sugar and water in a small saucepan gently. Heat until it reaches the short thread stage (a thread of about 1cm between a wet thumb and finger, or 108C/227F). Leave to cool slightly.
2) Give the egg yolks a quick whisk in a large bowl to combine them. Slowly pour in the cooled syrup, whisking all the time. Continue until the mixture is thick and bubbly.
3) Melt the chocolate in a microwave or bain marie. Fold the melted chocolate in to the eggs.
4) In a separate bowl, whip the cream until it forms soft peaks. Gently fold this in to the mousse mixture.
5) Pour the mixture in to ramekins (maybe layer with some raspeberry puree at this point) and leave to set in the fridge for 4 hours.

Wednesday 24 March 2010

Black and White Shortbread

I have been shying away from some of the more frivolous cookbooks in my collection, and find myself returning again and again to the Leith's Cookery Bible. I quite like the way pages upon pages of it are filled with French sounding dishes I've never even heard of. The first chapters give advice on how to cater a buffet for 80 people and the basics of food hygiene. There are few pictures, and they are mostly pretty useless for the basic home cook - 3 ways to present apple flans?

Black & White Shortbread

I had a craving for shortbread, and I had some chocolate left over from the stall that needed using up. I love making shortbread, as it uses very standard store-cupboard ingredients. It's ideal for late night baking sprees when you can't be bothered to go to the shop. It's also easily jazzed up by whatever ingredients you have lying around (I'm quite a fan of citrus and herbs).

Two-tone Shortbread

As the chocolate helps seal in the moisture, these keep really well. Be careful not to leave them in a warm place, as the chocolate will melt. While this won't affect the taste, they might become a bit blotchy looking. The rice flour helps to keep the texture really "short", but if you don't have any, you can substitute it for more plain flour.

Black & White Shortbread (adapted from Leith's Cookery Bible)
Makes about 8

110g butter
55g caster sugar
110g plain flour
55g rice flour
100g white chocolate
100g dark chocolate

1) Preheat the oven to 170C.
2) Thoroughly mix the sugar and butter together.
3) Add the flour, and gently knead to make a smooth dough.
4) Roll out the dough on a floured surface, to about 5mm thick.
5) Use a biscuit cutter to cut out large circles. Reroll the scraps until you have 8 biscuits.
6) Put the biscuits on a tray, and chill in the fridge for 30 minutes.
7) Bake in the oven for 20 minutes. They should be starting to turn golden.
8) Cool on a rack.
9) Melt the white chocolate in a small pot. Use a pot that the biscuits will only just fit in to, as you want it to be as deep as possible.
10) Line a baking tray with greaseproof paper. Dip the biscuits halfway in the white chocolate, and place them on the paper to cool. Put the tray in the fridge if your kitchen is warm.
11) Once the white chocolate has hardened, repeat steps 9 & 10 with the dark chocolate.

Saturday 20 March 2010

Australia Highlights

The worst part about holidays is when you have to come back. After several flights, 47 hours without sleep, and a rather large duty free bag full of TimTams, we arrived back to a rather cold and gray Edinburgh. Without the motivation of sunshine and new cities to explore, I have been rather slow to readjust my body-clock. I've never really been one for the solo lunch extravaganza, so I've found myself passing through the days on nothing but bananas, toast and the occasional bowl of soup.

Evenings haven't been much better. If I'm tired I revert back to my past narrow eating habits, endlessly flicking through magazines and cookbooks in the vain hope that something will inspire me. It does not. I am ashamed to admit our dinners over the past few weeks have been pretty dire, as I have lost all focus in the kitchen. I want to cook, but I have no desire to eat, let alone photograph and blog about such uninspiring food.

Hopefully my mojo should return soon, and I shall return to more frequent blogging. For the moment, here are some photos from the trip.
We had breakfast at the Sydney Opera House. A seagull ate the leftovers.

Macarons from Adriano Zumbo. His shop was amazing, with some fantastic, wittily named creations. We found the macarons a bit hit and miss - the black sesame; coconut and pineapple; and forest fruits with pink pepper were delicious. The cherry and banana was synthetic tasting, and the lemon verbena with mint was way too vegetal.

The vanilla heart was our favourite, and I was impressed at how accurate the piping had to be to make hundreds of identical hearts to sandwich together.

Melbourne was my favourite city. I loved the lanes and we were lucky enough to stumble across Gill's Diner. Here we had what was easily the best meal of the trip. I had a rabbit pastilla, which was bursting with spiced meat and surprisingly juicy chunks of dried apricot. It was accompanied by black sesame crusted labneh and peppery salad leaves. T had chicken 'Three Ways' - a dainty breaded drumstick, a roasted breast and a chicken sausage. We finished off with a plate of crispy churros with a chilli chocolate dipping sauce. The waiters were lovely, and kindly fitted us in even though the place was packed and we didn't have a booking. It was all very relaxed, with the menu written on a blackboard and large communal tables. I'd love to find a restaurant like this in Edinburgh.

Another delight we found among Melbourne's lanes was Koko Black, a chocolate shop with a few branches around Victoria. We had a Chocolate Spoil in the cafe, featuring chocolate cake, chocolate shortbread, raspberry and cognac truffles (pictured above), chocolate mousse, chocolate ice cream and 2 hot chocolates. The chocolate mousse and ice cream didn't last long, as they were particularly delicious. I was totally chocolated out by the end though.

Wednesday 10 March 2010

Onion Soup with Cheddar Croutons

Up to the age of about 15, I was a bit of a fussy eater. I would often decide what to eat in restaurant by ruling out all the dishes that contained things I didn't like, leaving a choice of only one or two dishes. I got away with being fussy, because I was comparatively normal compared to my siblings. At least I ordered something from the menu. My brother would just demand new creations. Pizza Express was the restaurant of choice as they would happily make a pizza with no tomato, extra ham and extra cheese. I always ordered Mushroom or La Reine. ALWAYS.

Eventually I got bored of this and started eating like a normal person. I even went to the other extreme, picking the thing on the menu that I thought I would least like, just to get over the fussiness. I knew I'd conquered it the day I ordered a Four Seasons pizza (Olives! Capers! ANCHOVIES!)

However, the one fussiness that I couldn't seem to shake was cheese. Mozzarella, cream cheese and Boursin were the only cheeses I'd eat, and only then when combined with other ingredients, preferably strong enough to mask the flavour of the cheese. I remember a family holiday in France, where a particularly insistent waitress asked if I wanted to share a cheeseboard with my parents. No amount of reasoning in English would dissuade her, but a firm "Je deteste le fromage" got the message through. On a field trip at uni we were served macaroni cheese, and just the smell of it made me want to heave.

Onion Soup with Cheese Crouton

I still want to get over my dislike of cheese. I'm slowly getting there. I'm usually fine with cheddars, brie and mild goats cheese. Parmesan and blue cheese still freak me out, but maybe one day I'll get there.

I thought onion soup and cheesy croutons would be a good way to introduce cheese into my diet. I went with a recipe from "Roast Chicken and Other Stories" by Simon Hopkinson, even though I was initially skeptical of pureeing the soup and adding cream. I really liked the tanginess of the vinegar and the wine, and a crouton added interest to the otherwise boringly silky texture.

Smooth Soup and Crunchy Crouton

Onion Soup (from "Roast Chicken and Other Stories")
Makes 4 portions

3 large onions
110g butter
50ml white wine vinegar
250ml dry white wine
600ml chicken stock
300ml double cream

1) Chop the onions into fairly small pieces. Sweat them in the melted butter with salt and pepper in a covered saucepan on a very low heat. After about an hour, they should be very soft and mushy but not coloured.
2) Add in the vinegar, and simmer until it is almost completely evaporated.
3) Add the wine, and reduce by two thirds.
4) Now add the chicken stock. Bring the soup to a simmer and cook gently for 30 minutes.
5) Puree the soup, and return to the heat. Stir in the cream, and reheat the soup, but do not boil. Check the seasoning and serve with a toasted cheese crouton (or 4).

Saturday 27 February 2010

Tiramisu - Daring Baker's February Challenge

Another month, another challenge!

The February 2010 Daring Bakers’ challenge was hosted by Aparna of My Diverse Kitchen and Deeba of Passionate About Baking. They chose Tiramisu as the challenge for the month. Their challenge recipe is based on recipes from The Washington Post, Cordon Bleu at Home and Baking Obsession.

I can't say I was overly thrilled by this month's challenge. I'm not a major fan of tiramisu (or Italian food in general. Shock Horror.) and the baking element was rather minimal. I did enjoy making the pastry cream though.

First up, the ladyfinger biscuits. This step was pretty straightforward, although my batter didn't make as many biscuits as the recipe said it would. I was really impressed with how professional the biscuits looked (if you squinted a bit and ignored the wonky bits). So impressed, I forgot to take any pictures.

Next I made the mascarpone cheese. This was an absolute nightmare. I heated cream in a double boiler, trying to get it to 88C. It got to about 70C and stopped. Long slow heating of cream makes clotted cream, and I could see the yellowy crust forming on my cream. I love clotted cream, but this was not the right occasion! The recipe said I would see small bubbles forming as the cream reached just below simmering point. Instead, the cream suddenly thickened and went very very stiff. I added the lemon juice just in case the process was still salvageable. There was no curdling, and I couldn't see any whey in the mixture. I strained the cream in cheesecloth. After leaving it overnight, there were two drops of whey underneath the cloth, and the cream was as solid as butter. It tasted like mascarpone, but the texture was too firm. I left it out to soften at room temperature.

Tiramisu

The zabaglione was next on the list of components. This thickened up nicely, although the lemon zest made it look lumpy even when it wasn't. I would have added the lemon at the end to give flavour but without making the texture so lumpy.

Moving on, it was time for the pastry cream. I'd made this once before for chocolate eclairs, and it had been a bit of a disaster. I was determined to get it right this time, and kept the heat so low that it took ages to thicken up and cook. It came out really well and I finally felt like something in this recipe challenge had gone right!

Finally, I made up the sweetened whipped cream, and assembled the tiramisu. The recipe said you needed a pint of coffee. I used about a quarter of that to soak the ladyfingers. I have absolutely no idea who is getting half a litre of coffee in to 25 sponge biscuits. The recipe said to use an 8inch square dish. Mine was 8.5 inches, so I thought it would be fine. After putting a few of the biscuits down in the first layer, I realised I'd be lucky to fill half the dish.

Finished Tiramisu

It tasted pretty good, and it was so rich that even though I'd only made a half size portion, I still got 6 platefuls out of it. I served it up to T's parents, who were in raptures over it, and were ridiculously impressed when T told them I made the ladyfingers and the mascarpone.

(As a side note, the next morning I was ill, and the sight of that tiramisu in the fridge turned my stomach so much I hid it in the freezer. Even typing this now is given me memories of nausea, so I think that it will sit in the freezer until I give in and throw it away. It's not bad, it just has negative connotations now.)

I didn't rate the recipe at all. Every stage seemed inaccurate or poorly explained, and the quantities were either too large or too small. So for that reason, I'm not going to link to it or write it out here. Hopefully next month's challenge will be a bit more inspiring!

On the plus side, I now have a bottle of marsala to swig every time the ironing gets too much.

Monday 22 February 2010

Salted Caramel Macarons

My first three attempts at macarons were pretty disastrous. Even looking back at the photos is making me cringe at how bad they were! My first go at a recipe from the Ottolenghi cookbook also entered into the "FAIL" category. I saw a few other blogs having success with the Ottolenghi macaron recipes, so I decided to remedy two fails with one baking session.

I had some egg whites already aging in the fridge, but I enjoyed weighing out 60g of them. I love doing everything by weight, mainly because I can't be bothered to get jugs and spoons out and create extra washing up. I don't know how Americans cope with cups. Have you ever tried scraping out peanut butter from the corners of a measuring cup so you can use it to scoop out another ingredient? It's lame. Buy a scale! Then you can just dump everything in one bowl!

A major problem with my last bunch of macarons was the lumpy mixture. They tasted ok, but macarons are meant to look a little bit pretty too. I don't have a food processor, so I gave the ground almonds and some of the icing sugar a bit of a bash around in a pestle and mortar before sifting them through a fine sieve.

I was also more confident about what the batter was meant to look like. It should be sturdy enough to pipe without running in to one big puddle, but soft enough that it will smooth down in to domes when left. After very carefully folding the sugar and almonds in to the whipped egg whites, it was obvious that the mixture was too stiff, so I got to give it a couple of good beats to get it down to a softer consistency.

After I'd piped all the macarons and topped them with some chopped peanuts, they sat by the radiator for a bit to form a skin while the oven preheated. In they went for 8 minutes, when I checked them to see if they were browning too fast.

Salted caramel and peanut macarons

YAY! While they were still underdone, every single macaron had a smooth topped dome, and some impressive looking feet. Another 4 minutes in the oven had the shells nicely starting to brown, and me dancing around the kitchen in triumph.

Finally with feet and smoothness!

Although I think that cooking is about making something that tastes good, there is always an element of presentation that I've struggled with. I don't have the patience to spend hours making things look perfect when all I want to do is eat them! So although my macarons had good feet and smooth tops, some of them were more ovoid that circular, so not a complete success, but good enough for me.

Once the shells were cool, I sandwiched them together with dulce de leche spiked with crushed peanuts and sea salt. I should have chopped the peanuts smaller and thickened the caramel more, as it was a bit oozy, and some of the larger peanuts made the macarons sit wonkily.

The smell when I opened the tin I'd stored them in was amazing, although I was a little disappointed that the peanut flavour wasn't that strong when it came time to taste them. However, after leaving them for 48 hours the flavours intensified, but the macarons lost a bit of their crunchiness. I would probably use more peanut next time to get the flavour and the texture.

The recipe is copied out here for your delectation.

Wednesday 17 February 2010

Spiced Apple Compote with Buttermilk Pancakes

I am possibly the least sporty person ever, and I can name the sporting events I follow on one hand: The Boat Race and the Winter Olympics. (I don't think Dancing on Ice counts as a sporting event.) I've been to a rugby game at Murrayfield a couple of times, but I just don't get sport.

I attempted to stay up for the opening ceremony of this year's games in Vancouver, but there was no way I was going to make it. So instead, I decided to watch the highlights while tucking in to a Canadian themed breakfast.

Buttermilk makes all things better and pancakes are no exception. That magical acidity reacts with the heat, flour and eggs to get things really light and fluffy. Buttermilk is traditionally the leftover liquid from churning cream in to butter, but most stuff you can buy on the high street is made by adding bacterial cultures to milk. You should be able to get buttermilk at any large supermarket, farm shops, delicatessens or healthfood stores. However, if you can't find it, you can substitute it for milk soured by 1 tablespoon of lemon juice or white vinegar per 250ml of milk. I've also subbed plain yogurt diluted with milk to a thick pouring consistency, with similar results.

Buttermilk Pancakes with Spiced Apple Compote

Normally I'd want these pancakes with berries and yogurt, but fresh berries just don't seem right in February. Instead I made simple spiced apple compote to go with my pancakes. The spices give it a warmth, and I used vanilla sugar to give the apples a bit of extra oomph.

Spiced Apple Compote
Serves 2


2 eating apples
A good lump of butter
2tsp cinnamon
0.5tsp cloves
4tbsp vanilla sugar (alternatively use caster sugar and a dash of vanilla extract)

1) Melt the butter in a saucepan over a low heat, and peel, core and roughly chop the apples.
2) Add the apples to the melted butter, along with the spices and sugar. Stir everything up, and cover with a lid.
3) Gently cook the apples for around 10 minutes, stirring occasionally. The butter should start to brown, and the apples will be soft enough to cut with a spoon, but still retain their shape.

Spiced Apple Compote

Canadian Buttermilk Pancakes Makes about 12 medium pancakes

150g plain flour
130ml buttermilk
0.5tsp baking powder
pinch of salt
3 eggs

1) Sieve the flour, baking powder and salt in to a large bowl, and make a well in the middle.
2) Dilute the buttermilk with 75ml water and pour this in to the well. Gently whisk in to the flour.
3) Add the eggs one by one, whisking until you have a thickish smooth batter.
4) Heat a large non-stick frying pan on a medium high heat, and coat with vegetable oil or butter.
5) Pour a small ladleful of batter into the pan, and cook for around 1 minute on each side. The pancake should puff up and be nicely browned.
6) Serve immediately.

Saturday 13 February 2010

Goat's Cheese & Onion Tartlets

I've been doing a cake stall in the evenings at a late night shopping event, and have found the savoury items go down just as well as the sweet. Although I love the bacon scones, I wanted something vegetarian too.

Goat's cheese seemed like a good idea, as did caramelised onions. I couldn't find a recipe I liked, so I winged it a bit. I thought this was one of the simplest recipes I make for the stall, although having typed it all out, it begins to seem quite complex! There are quite a few steps, but they can be done in stages over several hours.

Goat's Cheese & Onion Tartlets

I think they taste nicest served fresh out the oven, but they've had good feedback on the stall when I've been serving them at room temperature. They also keep well and will happily be reheated.

Goat's Cheese & Caramelised Onion Tartlets
Makes about 24

170g plain flour
55g butter
30g lard (use vegetable lard if making this vegetarian)
2 onions
150g goat's cheese
A little olive oil
Salt & Pepper to season

1) Begin with the pastry. Rub the butter and lard in to the flour along with a pinch of salt, until the mixture looks like coarse breadcrumbs.
2) Add in 2-3 tablespoons of cold water, and gently mix to form a dough. You may need to add a bit more water, but the pastry dough should be quite flaky and dry.
3) Wrap the pastry in clingfilm, and chill it in the fridge for at least 2 hours. Overnight is better.
4) Once the pastry is suitably relaxed, flour your work surface, and preheat the oven to 180C.
5) Roll out the pastry to about 3-4mm thick. You might need to knead it a little before it rolls properly.
6) Using a large biscuit cutter, cut out circles of pastry. Gently push these into a non-stick muffin tin, to form the tartlet cases. Reroll any scraps until you have 24 cases. (If the kitchen is warm, or the dough is getting too soft, chill the formed shells in the fridge for 30 mins or so.)
7) Place a small square of foil or greaseproof paper over each tartlet shell, and fill it with baking beans. Bake it blind for 7 minutes, remove the beans, and bake for a further 5 minutes. Remove the shells from the tin and cool on a rack.
8) Meanwhile, finely chop up the 2 onions. Cook them with some salt and pepper in a covered pan on a very low heat for about 30 minutes. Stir occasionally.
9) Once the onions are cooked, put 1 tablespoon of onion in to each tartlet shell. Thinly slice the goat's cheese and top off each tartlet with a slice of cheese and a sprinkle of black pepper.
10) Put all the tartlets on a tray, and bake for a further 15 minutes at 180C.

Tuesday 2 February 2010

Banana & Peanut Butter Smoothie

Like a lot of food bloggers (and certainly a lot of Scots) I like to start my day with a pint. Luckily for my liver, it's usually a pint of banana and peanut smoothie.

Bananas are probably one of my few textural phobias. I don't mind when they are ripe, but if they are over or under ripe they set my teeth on edge. Just thinking about that starchy mushy stuff is making me shudder.

Despite this, I can't bear to throw them out, and there's only so much banana bread you can make. Instead, I blend them up with milk and peanut butter to make a rather delicious smoothie. (Prepare yourself for some of the dullest photos I have ever published.)

Banana & Peanut Butter Smoothie

While this is a bit of a fatty combo, it does make for a pretty healthy start for the day. The banana is one of the 5 a day, plus it's a great source of potassium. The peanut butter has lots of vitamins and minerals, including selenium. One of the few interesting facts I still remember from my dissertation is that low selenium consumption in a population can be linked to the prevalence of HIV within that population. As I am not really a big consumer of dairy products, I also like having the milk in there, it's probably the only calcium I get.

The banana's sweetness really comes out in this drink, but it's balanced by the saltiness of the peanut butter. Putting it through the blender makes it very foamy, which adds a creamy richness that shouldn't really be there with semi-skimmed.

Mmm, foamy.

Banana & Peanut Butter Smoothie
Makes 1 pint/550ml

1 banana
1 generous tbsp of smooth peanut butter
350ml milk

Put everything in a blender and mix thoroughly.

For an extra twist, add ice cubes or chop and freeze the banana before blending.

Friday 29 January 2010

Chocolate Brownies with Chestnuts & Figs

The only cookbook I got for Christmas was Ottolenghi. This was good, as my cookbook shelf is full, and I didn't want the usual semi-novelty cookbooks I usually seem to receive ('101 Biscuit Recipes' anyone?)

I had a packet of chestnuts in the cupboard leftover, so I decided to make Khalid's Chestnut & Chocolate Bars.

The digestive base was easy enough, and the chocolate mix for the top was also very simple, with the most strenuous part being chopping a large pile of chestnuts, figs and white chocolate. It went in the oven, and came out very, very, very wobbly. So it went back in the oven for another 10 minutes and was still wobbly. The recipe said it wouldn't be totally cooked, but I didn't expect it to basically look the same as when it went in. I put it in the fridge to see if that would harden it up. Maybe the chocolate would set solid.

A few hours later, it was still way too wobbly. I tried to turn it out of the tin (luckily I'd used a silicone one) but it was obviously going to end in disaster. I gave it another 10 minutes in the oven, but it was STILL wobbly! I shoved it back in the fridge as I was not in the mood to deal with a massive pile of fail goo at that moment.

The next day I was immersed in the domestic bliss that is the life of the self/un-employed. After warming up with bouts of bed making, laundry and sweeping, I decided to deal with the fail. I thought I might spoon some over ice cream and bin the rest.

It had set! I was not expecting that at all. A bit of a push and it popped out of the tin in one lovely firm lump, and sliced up with a crisp finish that is just so satisfying.

After all the abuse I'd put it through, I wondered whether it would taste any good. The chocolate mix was flourless, so although it was firmer than it should have been, it was still moist, almost like a giant truffle. The chestnut and the figs were there, but weren't as overpowering as I'd worried they might be, but not really that flavourful either.

Chestnut & Fig Brownie Bars

I guess I'll have to give this another go before I reject the recipe altogether, but I wasn't that impressed. It was just digestives with a eggy ganache on top, with no stand out flavours or textures. Not offensive, but just not that amazing either.

Wednesday 27 January 2010

January Daring Bakers - Nanaimo Bars

The January 2010 Daring Bakers’ challenge was hosted by Lauren of Celiac Teen. Lauren chose Gluten-Free Graham Wafers and Nanaimo Bars as the challenge for the month. The sources she based her recipe on are 101 Cookbooks and www.nanaimo.ca.

I first discovered Nanaimo Bars while driving round the Canadian Rockies. I left mine in the car while checking out a lake, and it melted. When we got to Peyto lake, I buried it in some snow, and by the time I returned to the car, it was solidified again. Woo!

As well as being excited to make Nanaimo bars, I was also interested in gluten free Graham crackers. I've had a lot of requests for GF stuff on the stall, and I wanted to know what Graham crackers tasted like.

I couldn't find sorghum flour anywhere, and internet searches revealed that UK sorghum is rarely truly gluten free. Instead, I used more white rice flour to replace it.

The Graham crackers were otherwise uneventful. As mentioned in the recipe, the dough is very sticky and soft, and quite hard to work with. Despite flouring the surface loads, only 2 or 3 crackers out of each attempt were sturdy enough to make it off the worktop and on to the baking tray. Patience and a lot of re-rolling was necessary.

Graham Crackers

I didn't really like the taste. The honey flavour was a bit sickly, although the texture was very similar to digestives, which are often cited as the nearest thing the UK has to Graham crackers. I ground up the rest to use in the base of the Nanaimo bars.

I pretty much followed the recipe, except for the coconut. I failed to measure how much was left in the packet before writing the shopping list, so I only had half the amount needed. To make up for the missing coconut, I added in some oats as well.

Nanaimo Bars

The custard layer was incredibly thick, and it wasn't helped that the current weather meant that the kitchen as freezing, so the butter was very hard. I was worried that the custard powder made it taste chalky, but I hoped the other elements would make up for this in the finished product.

Finally, I topped the bars off with dark chocolate ganache. It was tricky to stop the warm chocolate seeping in to the custard layer, so it was important to cool the chocolate and work quickly to stop the custard melting. Once the chocolate layer was chilled, I turned out the bars and cut them in to shape.

Coconut, oat, almond & chocolate base, custard filling, chocolate topping.

They were just how I remembered. The sickliness of the Graham crackers was lost in the chocolate and coconut of the bottom layer, and the chalkiness of the custard had also disappeared. The chocolate topping mirrored the bottom layer nicely. Another great challenge from the Daring Bakers!


Monday 25 January 2010

Hot Spiced Mead - A Winter Warmer Cocktail

Although the German market in Edinburgh disappeared long ago, the Highland market was around until New Year. When we visited on New Year's Day, we all had sore throats from the partying the night before, as well as sore heads. After some tasty burgers from Well Hung & Tender, we found a stall selling hot mead, which we hoped would be soothing as well as restorative.

It was indeed both, and quizzed the girl behind the counter for the ingredients. Mead, wine, honey, sugar, apple juice and spices were in there, but she wasn't sure of the quantities.

I'd forgotten about it until the other day, when perusing the alcoholic offerings of the local deli in search of something to cheer me up in the darkest days of January. Some mead was purchased, quickly spiced, heated and drunk.

Cinnamon, cloves, star anise, mace.

I left out the apple juice, but reduced the alcohol content by gently simmering the drink for a minute or so before serving. I used a similar selection of spices to that of mulled wine - cinnamon, cloves, star anise and mace. Without the apple juice, I substituted a good squeeze of lemon to make it a bit fruitier. Annoyingly, it was only after I finished drinking that I thought I should have put a shot of Cointreau in there to get a zesty edge to the flavour.

Hot Spiced Mead

Hot Spiced Mead
Serves 1 - but can be easily multiplied to make more, you don't need to add more spices unless you are making more than 4-5 portions.

2.5 ladles of mead
1.5 ladles of white wine
0.3 ladles of sugar
1tbsp honey
good squeeze of lemon juice
1 star anise
1 cinnamon stick
4 cloves
1 blade mace

Place everything in a saucepan, and stir to dissolve the sugar and honey. Simmer the liquid gently for 30 secs to soften the alcoholic impact (but don't boil it all off!) and serve.

Saturday 23 January 2010

Duck Confit

I have been fighting the urge for the last month to make endless puns about Cold Confit Farm, and seeing something nasty in the fridge. While T is a knowledgeable type, unfortunately this knowledge does not include pre-war satirical novels. Or iconic French ways with water fowl.

When I first suggested making duck confit, T did not sound impressed. The idea of duck legs encased in a kilo of fat did not sound appealing. However, I bloody love a bit of duck confit, so stocked up on legs and fat and got to it.

I went with a Valentine Warner recipe, as I felt his enthusiasm and simplicity would be better than going with something more complex and elaborate. The recipe began by curing the duck for 2 days, with salt, herbs and juniper berries. Gin flavoured duck!

Then the legs were simmered in fat and white wine for 2 hours on a very low heat. I didn't quite have enough duck fat to cover the legs, so I topped up the pot with a little lard. Yum.

We had stuff in the fridge that needed using up, so it was a few days before I excavated 2 legs from the tub of fat and stuck them in a hot oven for 15 minutes. To go with it, I stewed some lentils in herbs and red wine, and sauteed some potatoes in the duck fat I'd scraped off the legs.

Duck Confit

It lived up to and beyond expectations. I think it helped that the potatoes were some of the best I've ever done, and the earthiness of the lentils helped to tone down the richness of the duck a bit. But that duck...! It was tender, flavourful, with crispy skin and the residual taste of the aromatic cure. If I could have gnawed on the bones I would have.

Look at the crispiness!

Duck Confit (From 'What To Eat Now' by Valentine Warner)
Makes 8

Salt
Pepper
Rosemary
Thyme
Juniper berries
8 duck legs
750g duck fat
150ml white wine

1) Rub each duck leg with salt and pepper. Layer in a tub with sprigs of rosemary and thyme, and some bruised juniper berries. Leave for at least 24 hours, and ideally 48.
2) Brush the salt and aromatics off the duck legs, while melting the duck fat in a pan on a low heat.
3) Arrange the duck legs in the pan with the fat, and add the wine. I found arranging them in an overlapping circle worked best - the shinbone from each leg rest on the thigh of the one next to it, so the meat is submerged. Duck fat melts at quite a low temperature, so you can do this without worrying too much about spitting fat or getting burnt. If you can't get all the meat under the fat, add more fat.
4) Adjust the heat so the fat is barely bubbling. The lower the heat, the better. Put a tight lid on the pan and check it frequently to see if it's too hot or cold.
5) After 2 hours, take a leg out and try to push the meat away from the bone. It should fall off with a bit of pressure, but obviously don't take it off the bone yet! Just give it a prod to see if it is coming away from the bone. If it still seems too solid, put it back in the pan for another 20-30 minutes.
6) Once the meat is releasing from the bone, gently stack the legs in a glass, china or plastic container. When the fat is cooled (but still pourable) pour this over the legs. The fat will help seal the legs from bacteria, so they will last for ages in the fridge.
7) When you want to eat the confit, put your oven up to about 200c, or its highest setting. Excavate the required legs from the fat, and put them in a deep baking dish (quite a lot of fat will come out of them so you don't want it slopping over your oven.) Cook for 15 minutes until the skin is crispy.

Monday 18 January 2010

Spicy Bacon & Cheddar Scones

If I were the Pioneer Woman, I'd tell you this recipe makes my skirt fly up. If I was Deb of Smitten Kitchen, I'd tell you you'll regret every minute you wait to make this recipe, and then post a picture of my cute baby. If I worked for Word Of Mouth, I'd say that I subbed Cheddar for Gruyere as I was staying true to my working class roots. If I was living in London, I'd worry about whether I should reveal that half the ingredients were PR freebies, start writing about unctuous pork, and then get so stressed out that I'd just blog about going to Tayyabs for dinner instead.

It's not skirt wearing weather, I don't have a cute (or plain, or ugly, or any type at all) baby, I'm not that working class, and all of the ingredients were bought with my own money. So there.

I've been doing an after work craft market in a bar, so I decided to make some savoury items to capture the crowd who aren't up for a pint of beer and a chocolate cupcake. After sifting through a huge pile of cookbooks for inspiration, I settled on the spicy bacon & gruyere scones from 'Bake' by Rachel Allen.

Bacon & Cheddar Scone

I changed from gruyere to cheddar for purely economic purposes. Baking is a fairly low margin product. When you add up the number of hours of labour I put in, minus costs, I'm lucky to make anywhere near minimum wage. Every penny counts in this game. Although I did buy free range bacon, because I'm not that cheap.

The recipe was fairly simple, although I was worried that the mixture was looking rather dry after adding the butter. I'd forgotten that buttermilk came in later, which took it to the other extreme of being too wet. The recipe says not to knead the dough, which is hard, as it doesn't seem to want to come together. Although the dough is quite sticky, it is fairly robust. This makes it quite easy to scrape the scones off the counter and on to the baking tray without them falling apart.

They rose really well, and had that stretchy look around the edges that is the mark of a good scone. Most of the time I don't try more than the crumbs of stuff I've made for the stall. Eating the produce is not great hygiene, as well as depriving me of much needed profit. However, there was a small blob of dough leftover that wasn't really big enough to sell, so I baked that as well to try it.

They smelt fantastic coming out of the oven, and I could barely wait for them to be cool before eating the mini one. The outside had a bit of crunch, while the inside was soft and airy (buttermilk is one of the best ingredients for airy baking, it's just a bit tricky to find!). The cheese flavour was clear, with a subtle spicy tingle from the cayenne. When you hit a lump of bacon, it went to the next level of deliciousness. The pre-cooking followed by baking meant that the bacon was crispy, and the fat had rendered in to the surrounding dough. My limited grasp of English vocabulary is not enough to describe how great these scones are.

Airy texture, with bacon peeking out.

Spicy Bacon & Cheddar Scones (From 'Bake')
Makes 10-20 depending on cutter size

450g plain flour
1 tsp baking soda
1 tsp cayenne pepper
1 tsp salt
30g cold butter
110g bacon, cooked and finely chopped (this cooks down to less than 110g, use more if you love bacon)
110g cheddar, finely grated (use gruyere if not being cheap)
1 egg
375ml buttermilk (or milk)

1) Preheat oven to 220C, Gas 7
2) Sift the flour, baking soda, cayenne and salt in a large bowl. Rub in the butter until it looks like fine breadcrumbs. Mix in the bacon and cheese.
3) Combine the buttermilk and the egg in a jug, and add it to the dry ingredients.
4) Stir until the mixture forms a dough. Turn it out on to a floured surface, and gently fold to fully incorporate all the ingredients.
5) Roll the dough out to about 2cm thick, and cut out the scones. I used a 3inch cutter to make monster scones, but you could use a smaller cutter, or even cut the dough in to squares.
6) Place the scones on a floured baking tray and bake for 10-16 minutes (depending on size). Cool on a wire rack for as long as you can bear, and then eat warm.

While these are best eaten straight away, they can be reheated at 160c for 6 minutes, although this does make the outside a little too crunchy. Sprinkle with water before reheating to minimise this.

Friday 15 January 2010

Raspberry & Whisky Porridge

I can't say I'm a major porridge fan. I didn't eat it as a child, and have been put off as an adult by poor catering porridge as suffered in various youth hostels and halls of residence. However, it is cheap and filling, so I do give it a go every now and then.

I'm always looking for new ways to pep it up. Chocolate and ground hazelnuts are always nice, as is dulche de leche and dried fruit. Today I tried a variation based the Cranachan porridge served by Stoats.

Raspberry & Whisky Porridge

I cooked the oats in a mixture of half milk and half water, and sprinkled in a pinch of salt and a fair bit of sugar. Then I added dried raspberries, which softened up as the porridge cooked. If you had fresh or frozen raspberries they would be even better. While rummaging through the cupboard for more Scottish ingredients, I found a whisky miniature. In it went.

Gloopy & Boozy

The porridge was a bit looser than I would have liked, and some of the dried raspberries were a little bitter. The whisky added some nice warmth to the bowl, which was welcome in this weather. I lasted a good 9 hours on this, so it was a good start to the day, although maybe not if you have to drive to work.

Wednesday 6 January 2010

Tarte Tatin

For New Year, we had T's brother, and 2 of their cousins staying in the flat. We had tickets for the outdoor concert in Princes Street Gardens, and the temperature was forecast to be -5C that night. With a few extra mouths to feed, and a warming meal needed, I decided to make a roast dinner followed by tarte tatin.

I attempted a tarte tatin last summer. It didn't go well. The pastry was undercooked and underwhelming, and the caramel wasn't sticky enough. I was determined that this one would be better, and decided to go with trusty old Leiths' recipe.

The first thing I noticed is that the pastry wasn't puff, or even ordinary shortcrust. It had rice flour as well as wheat flour. The pastry came together quite easily, who needs a food processor when you have a pastry blender? I rolled it in to a large disc between two sheets of baking paper.

Tarte Tatin

While the pastry was resting in the fridge, I chopped two cooking apples, and melted sugar and butter together in a frying pan. Leiths said to add lemon zest, but I decided a bit of cinnamon and nutmeg would be a bit more seasonal and warming. I layered the apple slices around the pan, and tried my best to make them look neat and even, but the in the end my presentation efforts were thwarted by my short attention span, and unwillingness to dip my fingers in boiling caramel.

Once the caramel had cooled slightly, I put the pastry lid on, and left it in the fridge until we'd finished our roast dinner. Once it went in the oven, the smell of the apples and caramel, with a hint of the spices, was wafting around the flat. It smelt great, but would the pastry be cooked? Would the caramel be ok, and would the cooking apples still be sour?

Mmmmm, leftover tart...

When it came time to turn the tart out on to a plate, it was obvious the pastry was cooked. The apples looked soft and sweet, and the caramel looked dark and glossy - success! Except, the very caramel in the centre of the tart was a little burnt. So not quite perfect, but near enough.

It was delicious served warm with a scoop of natural ice cream (plain cream flavour, no vanilla. I bought it by accident once and am now converted.) The spices warmed it up even more, and the caramel was almost right (apart from the burnt bit). The apples were soft, but still retained their shape and a bit of crispiness. We got through most of it that night, but I've been enjoying the leftovers reheated with ice cream. Or on their own.